I use Network Solutions as my domain name provider. Way back in 2006 or 2007 when I was in college, my dad recommended Network Solutions to me to buy my own domain name. Google Domains was not available yet. The domain name torstenknabe.com was available, so I bought it for 10 years. Who knew in the 80s that my parents giving me a German name would be a boon in the age of the internet. I have since kept them as my domain name provider when I had to renew in 2017, and I didn't feel like spending the money and effort to switch to something else. However, I didn't run across any guides to using Network Solutions specifically with Netlify. It ended up being fairly straightforward, but the documentation was unclear to me, so I'm writing up what I did and got working for anyone else in a similar situation.
Log into Netlify and add a domain I own - this is the one I bought with Network Solutions.
Follow the instructions here to Delegate your domain to Netlify to take advantage of the Netlify DNS servers.
- I did not have any DNS records to transfer first. If you're using email hosting, absolutely transfer those records first and pay attention to the Netlify documentation
The four name servers looks like the below image
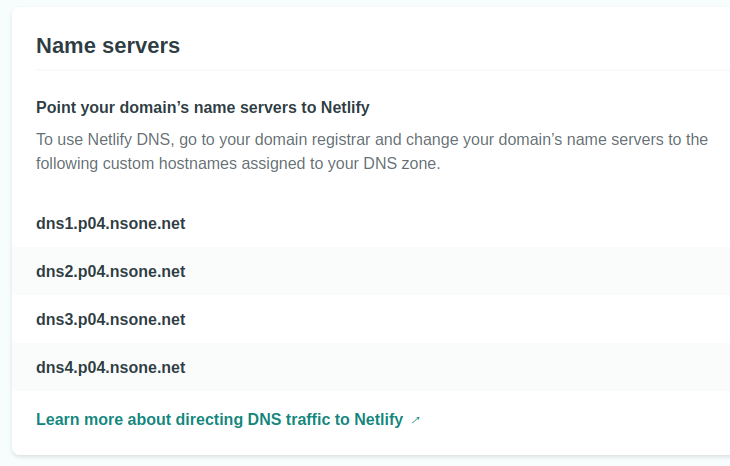
At this point you have everything that you need from Netlify and you need to login to Network Solutions.
From the home screen go to domain names on the left
On the Domain Names page scroll down to advanced tools and click the dropdown arrow on the right.
In the advanced tools box on the left hand side it will say Nameservers (DNS) and then Manage.
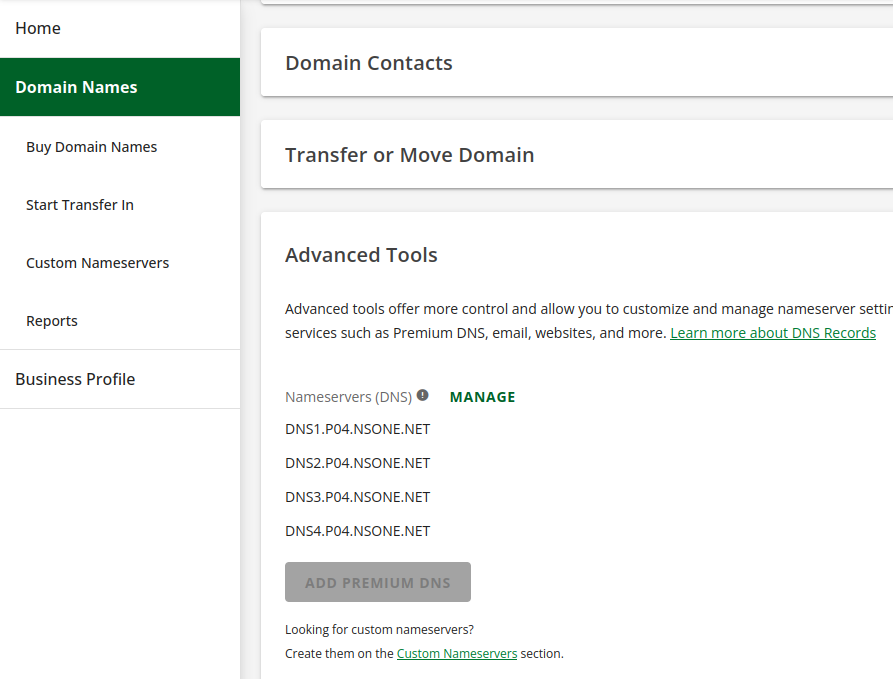
Once you click on manage, that will bring up a modal that allows you to add new namerservers. Add all 4 nameservers from Netlify in the box then hit save. It should look like the below:
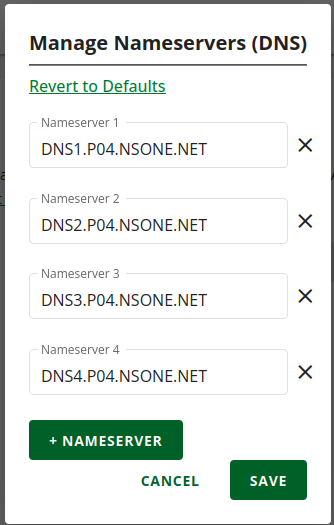
Once you hit save, that's all you need to do in Network Solutions.
The final step is the hardest one, you have to wait up to 24 hours for the DNS Time To Live (TTL) to expire.
Once up to 24 hours has passed you can go back to Netlify and check to make sure that they have automatically provisioned a Let's Encrypt SSL certificate for your site.
Gotchas
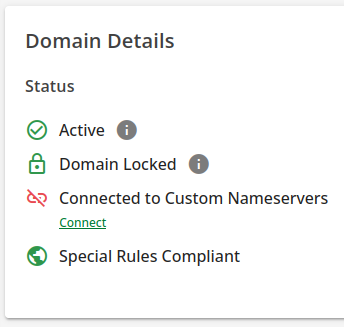
- When you're using custom nameservers, Network Solutions makes it look like something is wrong, it is not. On the Domain Names page in the Domain Details box, there is red icon that looks like something is off. That just means that the Network Solutions nameservers are off, which is exactly what you want.
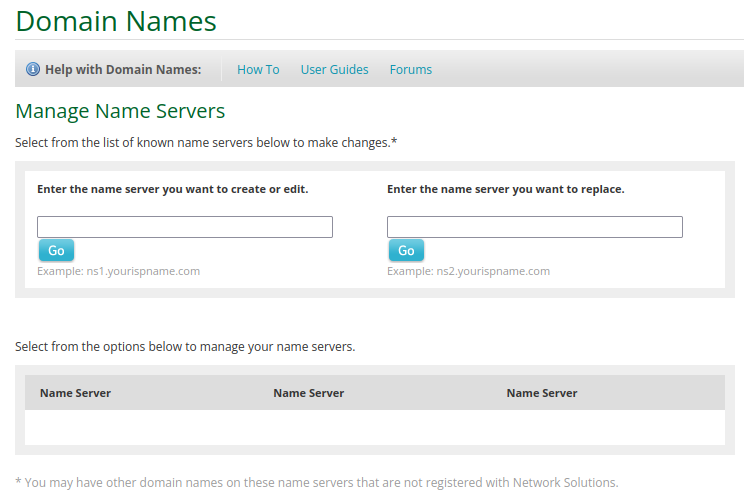
Network Solutions has a special page for custom nameservers. However, this is not what you want and as far as I can tell, does not work. You get there from the Domain Names page, and then on the left hand sidebar navigation there's a link for custom nameservers. However, when you go to add in one, it fails.
You may get your site working with http but before the let's encrypt certificate is provisioned. This is normal, and you'll see browser errors complaining about the certificate and warnings about security. These will entirely go away once Netlify provisions you a Let's Encrypt SSL certificate.